:::: MENU ::::

Monday, September 29, 2014

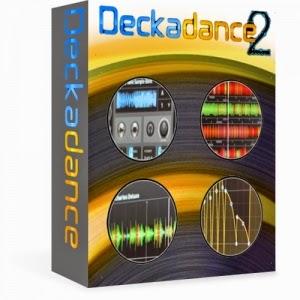
Deckadance DJ software

There are two versions of this software available. The DVS version of this software is a bit pricier, but it allows you to use time-coded records to enhance your scratching and mixing capabilities.

The layout of this software is nice and simple. You can have up to four track decks at once, with each deck utilizing its own EQ and gain knobs. The cross-fader between the tracks allows for you to smoothly transition from one deck to the next.

The library search bar works effectively. You can search through your library of songs by name, BPM, song length and artist name. You can create your own playlists to get your mixing happening fast and smooth.

This DJ program allows you to set up to eight cue points. You can jump from one cue point to another with ease. You can also use the sync button to match the BPMs between decks. This is a handy tool, as it allows you to focus on other aspects of your mixing rather than spending all of your time trying to make the beats match.


There is a control panel atop the software interface that allows you to switch between the mixer, FX, sampler and waveform view. The sampler is a cool feature on this software. It emulates a MIDI controller, such as an MPC 100. You can assign samples to each pad and include them in your mix by touching the pads. You can use your MIDI controller and map your software to correspond with your controller, as well.

Notable & New Features

Decks – Choose 2 or 4 deck mixing.
Smartknobs - Link a single knob to any number of FX & Mixer interface targets under userprogrammable
envelope control.
GrossBeat - 8 user defined FX per deck with integrated editor. Programmable and
automated glitch, stutter & scratch functions.
Frequency isolated effects - Up to 3 chained insert effects per track (choose from 10)
applied independently to High, Mid, Low or any combination of bands.
Sampler – 1/32 to 16 step beat-matched easy sampling. One shot, trigger, retrigger and
loop modes.
Smart Panels – User configurable Loop, Cue, Grid, DVS, Key, Smart Knob and Tempo
panels. From 2 to 8 per deck.
Customizable interface – Show only the features you use. Configure decks, smart panels
and Function panels to show your most used features.
VSTi host & client - Hosts VST plugins. Includes Effector VST plugin (see below).
Total MIDI Support – Wide range of pre-mapped MIDI controllers and the ability to custom
map any MIDI controller to work with Deckadance 2.
Library – iTunes library support. Play lists and automated mixing options.
DVS* - FinalScratch#, msPinky#, Serato Scratch Live#, Torq#, MixVibes#, PCJD Reflex#,
Virtual DJ# & Deckadance CD time-code. Deckadance can also learn any new time-code.

Deckadance DJ software

In addition to the internal effects, Deckadance 2 includes the Effector VST plugin with 12
performance oriented effects: Distortion, Lo-Fi bit reduction, Flanging, Phasing, Filter (low/high
pass), Delay, Reverb, Stereo panning & binaural effect, Gating, Granulizer, Vocal formant and Ring
modulation effects.

Input/Output

DeckaDance 2 can be used with a number of different controllers. Check out the Image Line website for more details. You can use all of the popular forms of data including WAV, MP3, AIFF and FLAC. DeckaDance 2 does not support video files.

EDITONS & PRICING

Deckadance is available for sale to the public in 2 editions and as an OEM version as Deckadance LE.
Pricing has been revised to represent even better value to customers.

Deckadance v2 DVS ($149)

• All Deckadance 2 features including DVS support.

Deckadance v2 ($79)

• All Deckadance 2 features excluding DVS support. Manual transport/mixing control is
provided via the supported MIDI controllers or through MIDI learn/mapping.

Deckadance v2 OEM (Free°)

• DVS not supported
• Smartknob presets only.
• GrossBeat presets only.
• MIDI locked to OEM controller/s
• Audio recording not supported.
• VST client and host not supported.


Help & Support

If you have any questions or concerns about your DJ mixing software, the support page for DeckaDance 2 has a FAQs section, downloadable user manual and video tutorials to get you going. If you need further support, you can sign in and email Image-line through the email forum. There is a phone number available, but it’s for the German headquarters.

Deckadance for Mobile

Image-Line has tried to squeeze many popular features (such as cue points, loops and sampler) into the Deckadance Mobile app, but at the expense of other more useful items. If the app makes more sense with a USB Midi controller, then perhaps the generous amount of space given to the decks on the screen could be reduced to make way for other features to come to the foreground. Let's hope that more features (such as Auto Gain) will be migrated from their desktop software to iOS in the future. At the moment, it feels like a work in progress.


Review: Deckadance Mobile For iPad


Deckadance for Mac and PC – originally released in 2007 – is an established if second-tier (as far as market share goes) DJ program. But as the company has some experience of providing solutions for DJs, and has obviously managed to hook it up for some pretty impressive scratch action via Midi, we thought we’d find out how Deckadance Mobile stacks up on the iPad.

Interface

Deckadance for Mobile

All the features of Deckadance Mobile are on one screen; while there are some hidden features through clever use of the central panel, the main focus is certainly on the two CDJ-style decks.
The cover art for your tracks is displayed on the deck face, with a neat blue LED-type of graphic in the centre that moves round as the track plays.
Deckadance for Mobile

While we’re focused on the deck area, there’s a tiny “Rev” button which can instantly flick the track into reverse play (the loop functionality will also work in reverse play). The “Loop” button on the deck is flanked either side by half and double buttons. If you have the central section showing the loop amounts, pressing the half/double buttons will move the selected loop amount up or down (from 32 beats down to 1/32).
Above the decks the track detail is displayed. Here you get a crisp waveform which is pleasantly colour-coded with red, which I believe is showing the bass/breakdowns, and green representing a more solid sound. Above the waveform is an indicator of the tempo control (curiously, the tempo with the tempo slider at zero is labelled as 1.00x – it makes sense but in a roundabout sort of way). The time remaining and BPM indicator are also displayed at the top.
When a track is loaded (using the standard music library access screen, no search, BPM data or sorting) the waveform and BPM are both calculated along with some beatgrid-style detection. You don’t see the beatgrids, but the app uses them when performing looping.
The BPM detection was good on most reliable 4:4 house/techno tracks, however if you started to deviate into the worlds of drum & bass or live funk then the BPM was anyone’s guess. Unfortunately, there’s no way to correct it within the app – ie no tap tempo and no half/double adjustment. The point I mention above about BPM is especially important since there is no form of headphone cueing. Yes, you read that right, not even with a splitter cable. You are totally at the mercy of the “Sync” button or your “peek-a-boo” crossfader skills! If the BPM and beatgrid detection aren’t correct then the “Sync” button will be of little use.

FX

Between the track displays at the top of the screen is the FX section. Here you can assign one of the four FX to each deck. Your choices are Ring Mod, Lo-Pass, Hi-Pass and Tap Delay. To assign an effect you tap the “A” or “B” (or both) buttons either side of the FX drop down list. The X-Y FX pad is a popular addition to DJ apps, however in this instance the pad area is so small (about 1 x 2 inches, possibly less) that controlling the parameter icon is difficult – and bear in mind I was trying this out in the comfort of my home and not in a DJ booth at a club.

There are also another five “Deck” style FX hidden on the central panel. These are Stutter, Turntable, Censor, Break and Spin. Also coupled with the FX section at the top is the Automix configuration – where you can set the app up to play one track after another automatically.

The BPM detection was good on most reliable 4:4 house/techno tracks, however if you started to deviate into the worlds of drum & bass or live funk then the BPM was anyone’s guess. Unfortunately, there’s no way to correct it within the app – ie no tap tempo and no half/double adjustment. The point I mention above about BPM is especially important since there is no form of headphone cueing. Yes, you read that right, not even with a splitter cable. You are totally at the mercy of the “Sync” button or your “peek-a-boo” crossfader skills! If the BPM and beatgrid detection aren’t correct then the “Sync” button will be of little use.

Tempo control

On the outer edge of each of the waveforms is the tempo control. This is about an inch in height which makes using the slider difficult to use to any degree of precision. For finer adjustments, the up (faster) and down (slower) arrows can be used. The tempo slider can be quickly reset to zero with a double tap. What I found curious with the tempo control was the calibration of the slider. It went from -50% through to +100% yet zero was placed in the centre. I felt that an equal measure above and below would make more sense here.

An omission on the tempo control is that of a “nudge” facility, where you just want to jog the track forward or back just for a moment to bring the two decks into alignment. Without this, getting two tracks to line up neatly during a mix (without using the “Sync” button) was incredibly difficult – even if you tried to use the deck platters to nudge a track along.

Central section

This is where a large proportion of the functionality lies – hidden. This section shows the main volume control sliders by default, however if you swipe from right to left over the “Vol” label you move through eight possible options for display:

Deckadance for Mobile

  • Vol – as mentioned, two simple deck volume control sliders
  • Cues – these allow you the ability to store up to four hot cues per track. If you record any hot cue points they will get flagged on the waveform display
  • EQ – three rotary dials for hi, mid and low – all can be double tapped to return to centre position
  • Wav – you get a scrolling waveform moving away from you, green for the left deck, orange for the right. You can also use this display to scrub through the audio
  • Loop – you can set the loop length for on-the-fly looping which can be different for each deck
  • Sampler – this was a surprise addition (at least for me) to the feature list. The sample banks are pre-loaded (I don’t think there’s an option to change them) and grouped into five buttons. Each button has a number of samples that it can fire, and you can scroll between the sounds using the buttons either side. The important bit to remember here is the sample volume control above, as it plays out over both decks and independent of FX!
  • FX These are a selection of track playback style effects, including various ways of stopping the track playing among others
  • About This contains basic information about the app version and a link to register with Image-Line for updates and support
Although there are plenty of features in the app, I was left looking for configuration options (as with other DJ apps) so I could tailor the tempo control to my preference or adjust the crossfader curve for my style of mixing (haphazard, in case you were wondering!). At the moment there are no configuration options (except those for the Auto Mix feature).

Although Deckadance Mobile is available in the App Store, it is going through a “soft-release”, presumably for any issues to get ironed out before the main launch. The developers have promised that cue functionality is on its way to the app, however it does surprise me that this wasn’t higher on the list of “must-haves” before initial release.

- iPad version available.
- iPad3 HD version comming soon.
- iPhone / iPod version in development.


Novation Launchpad

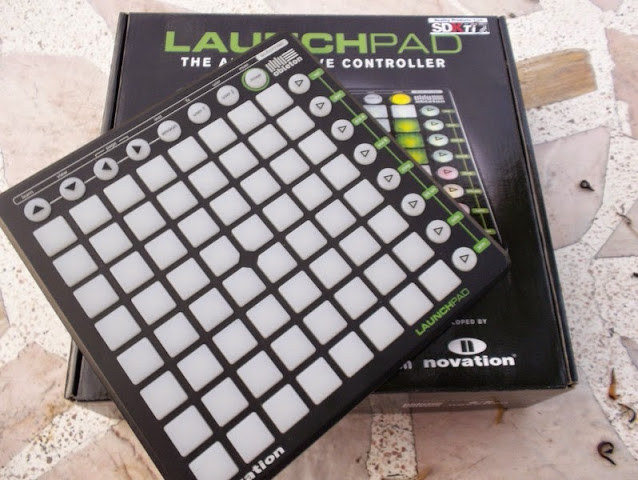
Launchpad is a dedicated controller for Ableton Live, co-developed by Novation and Ableton. Perfect for DJing, performing live or working in the studio, Launchpad features a multi-color, 64-button grid, control modes for the Session View and Live's mixer, two fully-programmable User Modes and dedicated scene-launch/function buttons. Despite the big grid, Launchpad is neat, compact and portable: 239 x 239 mm with a slim 24 mm profile and weighing only 717g.


Launchpad uses four different modes:
  • Session Mode for controlling clips in Ableton Live's Session View
  • Mixer Mode for controlling Live's mixer
  • Two User Modes for custom device control and configuration.

Features

Big grid

Launchpad features a multi-color, 64-button grid for launching clips plus eight dedicated scene-launch buttons. The buttons are lit by LEDs displaying clip status so you can see at a glance what's loaded (orange), what's playing (green), and what's being recorded (red).

Compact, portable

Despite the big grid, Launchpad is compact and portable: it'll fit in your bag for gigs and won't hog your desk space in the studio. It's slim, sturdy, weighs less than a hardback book and it's USB powered, so there's no power adapter to drag around.

4 modes for flexibility

It's not just about launching clips: as well as the Session Mode, Launchpad offers Mixer Mode--a unique way to control Ableton Live's mixer--and two fully-customizable User Modes.

Innovative mixer control

In Mixer Mode, the rows and columns of the grid become virtual faders, sliders and knobs controlling track volume, pan, sends, mute, solo, Clip Stop Buttons and record arm, depending on the function selected. Use the scene launch/mixer function buttons to select the function you want to control.

Customizable

The two fully-customizable User Modes transform the grid into a drum pad controller, DJ effect controller or anything else you can think of. The default state for User Mode 1 provides drum pad control for Live's Drum Racks--great for sketching out beats. Using Live's simple MIDI mapping, it's easy to create custom control environments, whatever devices you're using and however your Live Sets are configured.

Made for Max for Live

The User Modes make Launchpad the ideal hardware counterpart for Max for Live. Launchpad is flexible enough to deal with even the most detailed Max for Live devices and can handle generic parameters and controls with ease. Eleven LED states provide visual feedback that's precise enough for complex devices. Launchpad users will soon be able to download a Max for Live step sequencer patch from Novation and more Max for Live patches are planned for the future.

Communication goes both ways

Live and Launchpad are in a constant, two-way, hardware-software dialog. The back-lit grid buttons show what's happening in Live and Live, in turn, shows which section of the Session View is currently under Launchpad control: a red border around the current clip group let's you see where you are with a just a cursory glance at your screen.

Navigating the Session View

Obviously, you're not limited to controlling only 64 clips. The arrow buttons move the grid up, down, left and right one track or scene at a time. Hold down the 'Session' button in Session Mode, and you can use the arrow keys to jump eight tracks or rows at a time--very useful for navigating around large, complex Live Sets.

More buttons? More Launchpads

Want more buttons? Launchpads are designed to work together, with up to six units at once. That's more than 400 assignable buttons! Launchpads running on the same system can run in different modes, so you can control the Session View, mixer and custom setups all at once, with one Launchpad for each.

Pricing and availability

Launchpad is available now in stores worldwide. Pricing is around USD 199 (MAP)/149 EUR (VAT not included).

Software system requirements

Launchpad requires the latest available version of Live 7 or Live 8.

Mac: Any G4 or faster (Intel Mac recommended), 512 MB RAM (1 GB recommended), Mac OS X 10.3.9 (10.4 or later recommended), QuickTime 6.5 or higher, DVD-ROM drive

Windows: 1.5 GHz CPU or faster, 512 MB RAM (1 GB recommended), Windows XP or Windows Vista, Windows compatible sound card (ASIO driver support recommended), QuickTime 6.5 or higher, DVD-ROM drive.

FL Studio Mobile
2.4 for iOS / 2.0 for Android

FL Studio Mobile

Description
FL Studio Mobile allows you to create and save complete multi-track music projects on your Android phone or tablet device. You can even load the FL Studio Mobile projects into the 'FL Studio Desktop PC' version* and take them to the next level.

If it’s a beat on the step sequencer, a melody on the piano roll or a full song on the playlist, FL Studio Mobile has you covered. Never lose that idea again. Get it down and happening wherever you are.

Features

133 high quality instruments, drum kits & sliced-loop beats
• All instruments have FL Studio desktop equivalents for FL Studio desktop import and extension
• Step sequencer for fast percussion programming and sliced-loop reworking
• Configurable virtual piano-keyboard
• Drum pads: Configurable number of pads
• Audio tracks: audio recording (with monitoring), wav/m4a import
• Wave editor: cut, trim, normalize, reverse, insert silence, fade in/out (3 curves)
• Browser with preview button and logical sorting into Instruments, Synths, Drum kits & Loops
• Pan, volume, release and attack time configurable per instrument
• Pitch bend via accelerometer
• High quality, battery-friendly audio engine (latency depends on the device)
• Drum loops and sliced loops ready to start your project with a cool beat
• Effects include Limiter, Reverb, Delay, EQ, Amp & Filter to enhance your mix
• 99 track sequencer and intuitive editing options
• Per-track mute, solo, effect bus, pan and volume adjustment
• Edit at the level of tracks, bars or down to individual notes
• Piano roll editor for manual entry of note & chord sequence data or detailed editing of recorded performances
• Undo and redo for all editable screens
• Metronome with tempo & time-signature settings
• Intuitive positioning of screens with the slide gesture and resize with the pinch gesture
• Save and load your songs, export to WAV and AAC
• MIDI file import/export
• Share your songs via Email or Dropbox
• In-app user manual
• Android 2.3.3 required
• Works with all screen resolutions, optimized for 1280x800, 800x480, 960x640 and 480x320 screens.
Android System Specifications

OS: Android 2.3.3 or higher.
Screen resolutions: Works with all screen resolutions but is optimised for 1280x800, 800x480, 960x640 and 480x320.
CPU: Multi-core supported. The faster your Android device the more you can do with FL Studio Mobile.
 
NOTE: A custom ROM, a rooted Android OS (with privileged apps installed) and antivirus software can cause significant performance issues.
* "FL Studio" desktop PC version (sold separately) is installed, on average, over 30,000 times each DAY making it one of the world's most popular and exciting music production systems. Everything you need in one package to compose, arrange, record, edit, mix and master professional quality music, the perfect studio partner for FL Studio Mobile. You can download the demo version of the FL Studio Desktop PC version and enhance your FL Studio Mobile projects for free then save to .mp3, .wav, .ogg or .mid format.


Harmor Vst Plugin

Just like its little brother Harmless, Harmor is driven by a powerful additive synthesis engine. Its modules will look familiar to subtractive synthesizer enthusiasts: oscillators, filters & phasers, these are featured in Harmor but, because performed through additive synthesis, offer more freedom. You don't just select filter types, you draw them.


You wanted more, so also featured is the multipoint envelope editor of Sytrus fame, applied to over 40 parameters, in 2 independent parts. Through the same envelope/mappings, randomize any parameter or link it to key or velocity, and even fine-tune each unison voice independently.

Processing units can be rearranged in a semi-modular way. If you need one of the 2 filter units processed after the blur unit, that's no problem.
Because it typically requires manipulating large amounts (up to 500 per voice) of partials over time, additive synthesis is hard to handle. No human can (or even wants to) edit 500 envelopes, but editing 2D images, that we can do easily. Get access to gain & pitch planes which you can tweak in the image editor of your choice, and import any bitmap, even if it wasn't designed to be turned into audio, it might still sound interesting.
Being an additive synthesizer, Harmor can resynthesize audio files as well. The reproduction will be faithful, not a vague sound-alike as in many additive synthesizers. Resynthesis can of course be tweaked, providing time stretching, pitch shifting, or less conventional manipulations of partials.
And of course, the result of the analysis can still be turned into an image for further editing.
Additive synthesis is generally very CPU-consuming, but not Harmor's engine. Its efficency is in fact, comparable to that of subtractive synthesizers. Voices may be generating hundreds of harmonics in parallel and still not overload the CPU. Processing being multi-threaded, extra CPU cores come in handy.

 System requirements

  • Windows 7 & 8, Vista, XP (SP2) - (32 & 64 Bit OS)
  • 2Ghz AMD or Intel Pentium 3 compatible CPU with full SSE1 support
  • 512Mb RAM.
  • 30Mb free disc space.
  • DirectSound or ASIO compatible soundcard.


How to Make a Cheap Recording Studio 2023

As computer technology has developed, more and more performance is possible on a lower and lower budget. As a result, building a simple home recording studio around your existing computer can be quite inexpensive. Learning how to make a cheap recording studio at home requires an assessment of exactly what you'll be using the studio for and what quality of sound you need. The guide below outlines what to look for in each piece of equipment.


1. Purchase a computer
How to Make a Cheap Recording Studio 2023


If you don't already have a computer to use in your recording setup, you will need to purchase one. Important considerations are processing speed and amount of memory, as recording software tends to use your computer's resources heavily. Both Windows and Mac platforms will work well; however, Windows machines typically allow for easier upgrading of the sound card. Factory-installed sound cards are not usually robust enough to produce high-quality recordings, so upgrading is a good idea.

2. Choose a piece of recording software

The recording software provides the interface through which you will manage your recordings on your computer. There are several options for small budgets. Generally, the more expensive applications offer greater functionality and flexibility.
  • For recording on a very small budget, you can use recording software licensed as freeware or shareware. Audacity and GarageBand are 2 popular choices for low-budget recording.
  • With a slightly higher budget, you can purchase near-professional quality recording software such as Ableton Live or Cakewalk Sonar. Both of these applications are also available in entry-level versions that are less expensive but less powerful.

3. Purchase and install an audio interface

How to Make a Cheap Recording Studio 2023

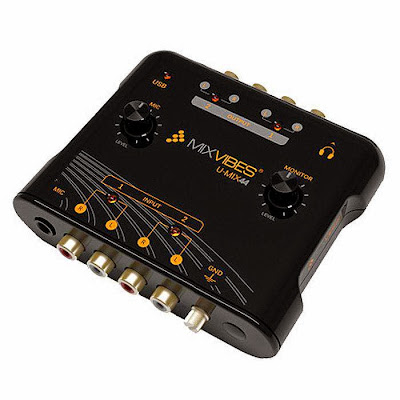
An audio interface is a piece of hardware that replaces your computer's sound card and allows you to connect your instruments and microphones to your computer through a mixer. On a PC, you will usually install your audio interface in an empty PCI slot. On a Mac, you may need to purchase an interface that can be connected through a USB or FireWire cable.

  • At the least, make sure your audio interface has 2 input and 2 output jacks. This will allow you to record in stereo. For more flexibility, choose an interface with 4 input jacks.
  • One of the top manufacturers of audio interfaces for home use is M-Audio. They produce both entry-level and high-end models.

4. Buy an audio mixer

How to Make a Cheap Recording Studio 2023

A mixer is an essential piece of equipment for any home recording studio. The mixer handles all your inputs (such as microphones, guitars, and keyboards), allows you to adjust each input's settings, and routes the output to your audio interface and into your computer.
  • The basic functions on an inexpensive mixer will usually be adequate for home recording needs. At the least, make sure each channel on your mixer includes adjustments for panning, volume, and 3-band equalization. Four channels will be more than adequate for home recording.
  • Popular brands for entry-level mixers are Behringer, Alesis, and Yamaha.

5. Choose studio monitors and headphones for your studio

How to Make a Cheap Recording Studio 2023
 
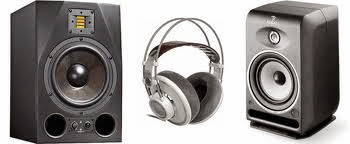
The speakers you use to listen to your mix during editing are called studio monitors (sometimes referred to as reference speakers). Studio monitors differ from other speakers in that they are meant to deliver a perfectly flat frequency response. This means that you are hearing your recording exactly as it exists digitally, without any frequency adjustment. 
  • When choosing studio monitors, make sure to look for "near-field" models. These are designed to be listened to from about a yard (1 m) away, and so eliminate any effects due to the acoustics of your room.
  • Studio monitors can be purchased used from online classifieds sites or audio retailers. The robust, simple construction of loudspeakers makes them an ideal component to buy used and save money.
  • In addition to or in place of monitors, you can buy a set of headphones. Headphones provide the advantage of being cheaper, smaller, and less likely to disturb a neighbor or housemate. Headphones can be used in conjunction with studio monitors to assess very low-volume components of your recordings.
6. Decide on a microphone(s) to use in your studio


How to Make a Cheap Recording Studio 2023


An inexpensive home recording studio can be managed with only a single microphone if necessary

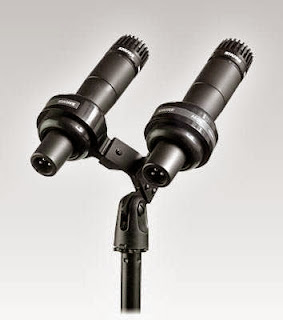
If you only buy 1 mic, make sure to choose a dynamic mic. This type of construction is more robust and versatile, and is self-powered. An industry standard dynamic mic is the Shure SM-57, which can be used for vocals and instruments.If you need to record very quiet or expressive instruments, such as an acoustic guitar or piano, a condenser mic will provide better results. Condenser mics aren't as rugged or versatile as dynamic mics, but provide more sensitive response. A cheap recording studio can readily make do with 1 dynamic and 1 condenser microphone.


Tips
  • Building your recording studio inexpensively often means building from what you already own. Using existing components such as microphones and computers, even when they are not ideally suited to the task at hand, will keep your budget low.
  • Additional equipment may be needed depending on your recording needs. If you are interested in using the "soft-synth" instruments including with your recording software, for instance, you will need a MIDI interface and keyboard.
  • If you do not have any recording equipment, you can get the following to set up a reasonably cheap yet efficient set up:
    • Apple Mac Mini
    • 2.3GHz Quad-Core Intel Core i7 (Turbo Boost up to 3.3GHz) with 6MB L3 cache
    • 1TB (5400-rpm) hard drive2
    • Intel HD Graphics 4000
    • 4GB (two 2GB) of 1600MHz DDR3 memory
    • M Audio Studiophile AV 30
    • Focusrite Scarlett 2i2 USB 2.0 Audio Interface
    • Samson C01 Large Diaphragm Condenser
    • Samson RH300/Samson SR850/ Audio Technica ATH M30 or JVC Harx 700 Reference Headphones


Saturday, September 27, 2014

Reaper software


Reaper software


Leave all your preconceived notions at the door when you consider Reaper audio studio software. From recording capabilities to overall value, Reaper is unlike any other studio production software we reviewed. It gives you limitless audio tracking capabilities, hundreds of audio plugins and an interface that is easy to use.
Reaper began as a free program for beginning users to gain experience with a DAW station. The software has differentiated itself in the recording studio industry by providing a fully functional DAW that is inexpensive and downloadable. This studio production software earns our Top Ten Reviews Gold Award for innovating in the recording industry and keeping the average consumer in mind while doing it.

Due to its smaller file size, Reaper loads fast and gets you started with your recording session immediately. It won’t take up much of your CPU and slow your computer down either. When you open Reaper for the first time, it will open up a blank recording session for you to begin recording.

The music production software features unlimited audio and MIDI tracks per session, and you can record unlimited tracks simultaneously. Not many entry-level digital audio workstations provide this type of recording. Unlike other audio production software, Reaper does not have track types. Any track you add to your session can be turned into a bus channel, used as audio or MIDI. Reaper provides recording versatility like no other DAW.

Recording with this software is easy. After you mike your instruments, routing each track to the correct input is as easy as clicking on the input marker and scrolling to the correct input.

Mixing


This is one of the best music production software to mix with. Reaper streamlines your workflow by allowing you to edit various parts of your recording audio without having to change tools every time you want to make an adjustment. Every recorded track has points or handles which you can click and adjust to create fades, volume swells, snap-points and more.

The mixing board is clean and easy to navigate. You can apply unlimited insert and send effects to your tracks. One of the insert effects available is a multi-band equalizer that lets you get in depth with the frequencies of your recorded tracks and dial-in the tone you want. Within the mixer you also have pitch-correcting abilities that allow you to change the pitch of an incorrect note without having to re-record anything.

Plugins


Plugins are the extra sounds, noises, effects and musical textures that bring your recording music to the next level. Reaper understands that plugins make a tremendous difference, and that’s why this music production software offers over 300 plugins. You can produce full songs using a MIDI controller, six virtual instruments and the 40 MIDI plugins to add texture to your digital recordings. On top of providing ample plugins, Reaper is compatible with a plethora of different plugin formats. You can add your favorite plugin packages to this software to create clean recordings.

The availability of so many plugins can make recording as easy as plugging your guitar straight into your interface and hitting record. You won’t have to worry about losing guitar tone because you can shape your tone with any number of plugins. There are equalizers, delays, compressors, overdrives and more effects that you can add to your tracks to shape the sound you want.

Specifications


Editor’s Note: This information was taken directly from the manufacturer’s website. 

Track Record Modes
  • Audio input
  • MIDI input
  • MIDI overdub
  • MIDI replace
  • MIDI touch-replace
  • Track audio output
  • Track audio output
  • Track audio output, latency compensated
  • Track MIDI Output
  • Input FX: monitor MIDI, record audio, or vice versa or any variation
Loadable Plugin Formats
  • VST, VSTi
  • DX, DXi
  • AU (OSX only)
  • ReWire
  • JS (user-scriptable plugins)
Operating Systems
  • Window 2000/XP/Vista 7/8
  • OSX 10.4/10.5/10.610.7/10.8
  • Linux/WINE
  • Windows 98/ME (limited)


Friday, September 26, 2014

Having a home recording studio with great sounding monitors is a must. Whether your recording vocals and instruments, or mixing and mastering, your home studio monitors have to be on point. Finding the right studio monitors can be a daunting task especially when price and quality play a factor in your decision. We decided to compile a list of the top 3 monitors for producing music. All of the monitors we selected are based on overall sound quality, price and user ratings. Make sure to check out these great monitors and let us know what you think!

1. KRK Rokit RP5 G2 Powered Desktop Studio Monitors
Top 3 Monitors For Producing Music

These KRK Rokit 5′s are one of the best sounding home studio monitors for the price. We tested these monitors and found them to deliver a clear, true sound. It provides an optimal high frequency pattern control and pushes the sound away from the cabinet. We have mixed several songs with these bad boys and are impressed by the true sound they deliver. The accuracy of the levels and crisp sound put these speakers on the top of our list!


2. Behringer Speaker MS40 Digital 40-Watt Stereo Near Field Monitors
Top 3 Monitors For Producing Music

These Behringer monitors deliver excellent sound quality. These are ideal for any small home recording studio that is on a budget. The high resolution tweeters and powerful woofers deliver a clear frequency response. When we heard these speakers we were shocked at its dynamic range. It easily connects to almost any media interface and its sleek design will make your home studio look more professional.


3. M-Audio BX5 D2 5″ Active 2-Way Studio Monitor Speakers
Top 3 Monitors For Producing Music

M-Audio has always made great studio monitors and these are no different. The BX5 active 2 way monitor speakers deliver superb sound quality unlike anything in its price range. It has 70 watts of distributed power and a low frequency transducer for pristine lows. You can reproduce your mix with excellent accuracy with these awesome speakers. You will hear how everything in your mix sounds with amazing results. Having the right speakers for playback and mixing purposes in a must and these M-Audio monitors will not disappoint, which is why it made our list for the top 3 monitors for producing music.


Learn more and get these studio monitors from amazon.com


Sunday, September 21, 2014

Marketing your music online is one of the most important parts of an artists career. You can have the best music on planet earth, but if nobody hears it, you can’t make a career from it. We decided to put together an easy guide on how to market your music online. We will break down the ins-and-outs of the music industry and how to really get your music to the masses. We have marketed music for independent artists which has led to over 1 Million digital downloads! So, enough talk, lets get into it.

How To Market Your Music Online


 1. Your Material.

By this point we are sure that you have professionally recorded, mixed and mastered your material. But believe it or not, many artists haven’t. Musicians tend to believe that having good music is enough, when it isn’t. Sure your melodies and production sound good, but is it recorded properly? With the ever-expanding home studio setups, it is getting even easier to create music.
Just because you can hit record and sing doesn’t mean it is recorded properly. Before you move on to the next steps, invest in your craft and make sure that your production is up-to-par with what you hear on the radio. Also, make sure that it is properly mixed and mastered. It is not worth marketing your music if a program director at a radio station won’t spin your records due to its quality. Sound quality is key!

 2. Your Image

 Every band/artist that becomes successful owes it in part due to their image. They stand out from the rest, they have that “it” factor. Your image is what the audience sees before anything else, so it has to be something they want to engage in and relate to. Make sure your image says what your music is about and why you’re different from the million other musicians in your genre. Try to create a “persona” that reflects who you are as an individual and highlight that through your style of music. Your image will be key in marketing your music, in fact it is the most important part.


3. Your Online Presence

 Having an online presence is extremely important before investing in your online marketing strategy. Having a professional looking website and EPK (Electronic Press Kit) is vital for potential fans to engage and learn more about you. All of your images and music should be easily streamed and downloadable. You can create an easy yet professional looking website at GoDaddy.com. It will cost a little money but it will make you and your band look like the professionals you are.

Once you have your website established, make sure to properly get it Search Engine Optimized (SEO). SEO allows users to easily find you on top search engines like Google and Bing. This makes it easy for fans to find your music just by typing in your song title or band name in search engines.
Setting up artist websites at Reverbnation, Soundcloud and DatPiff are essential for any musician. They extend your reach on the web and offer excellent marketing strategies to get your music out to the masses. These are great ways to establish an online presence. Always remember, the more you flood the internet with your content, the more you will get noticed!

4. Your Social Media Presence

 Setting up proper social media websites is also key in today’s every changing world. Make sure that you have the right images and music uploaded to your social networks for streaming and downloading.  If you don’t have it already, take time to set up a Facebook fan page, a Twitter and Instagram accounts. Make sure to be up to date with other social media channels such as Vine and implement your music and brand so the social media world can follow and keep in touch. This is one of the easiest and cost effective ways to market and get your music to a new audience.

 5. Your Online Visuals

Creating music videos for your tracks are essential in marketing your music. Having visuals to go along with your music is a great way to help fans connect visually with you. Setting up band YouTube and Vevo accounts is extremely important. Even if you don’t currently have the budget to to make a professional music video, setting up picture slides of you and your band with your music in the background will help get you noticed.
YouTube is a very powerful form of marketing, many top industry professionals utilize these websites for promoting with great results. The coolest thing is that YouTube and Vevo will actually pay you for putting advertisements on your vids. This is a great way to make money and get noticed! Applying the same videos to your social media and artists websites will also increase the demand for your music. Try to find innovative ways to catch the listeners attention and make viral videos.

6. Your Digital Distribution

  Nowadays it is really easy to distribute your music on all the major online retailers like iTunes, Rhapsody, Napster, etc. There are a ton of companies that will send your music to all these retailers at a cheap price. Our personal favorites are Mondotunes and CDBaby. Both have great rates and are well respected in the music industry. Many major labels like Sony and Universal use them to distribute their material digitally. This is an important step when it comes to marketing and getting your music next to the worlds largest digital distributors.

7. Your Advertising Campaigns

Setting up a Google Adwords account is a great way to learn how to market your music online. Google is very effiecient when it comes to putting targeted ads on websites. You can easily set up an ad campaign using keywords for your genre of music and demographics. You will have to invest some money but there is no better way to market your music on a small budget online. We have used Google Adwords with great results. It may take a little time to learn how to use it but check out the cool video below to help you learn more.


Wednesday, September 17, 2014


Music comes from the Ancient Greek muses, who were the nine goddesses of art and science.  Music actually began around 500 B.C. when Pythagoras experimented with acoustics and how math related to tones formed from plucking strings.  The main form of music during the Middle Ages was the Gregorian chant, named for Pope Gregory I.  This music was used in the Catholic Churches to enhance the services.  It consisted of a sacred Latin text sung by monks without instrumentation.  The chant is sung in a monophonic texture, which means there is only one line of music.  It has a free-flowing rhythm with little or no set beat.  The chants were originally all passed through oral tradition, but the chants became so numerous that the monks began to notate them.  

During the Renaissance Period, vocal music was still more important then instrumental.  A humanistic interest in language created a close relationship between words and music during this time.  Composers began to write music to give deeper meaning and emotion to the words in their songs.  They wrote in a style referred to as word painting, where the music and words combine to form a representation of poetic images.  Renaissance music is very emotional music, although to us it seems to be much calmer.  This is because the emotion is expressed in a balanced way, without extreme contrasts of dynamics, tone color, and rhythm.  Renaissance music has a mostly polyphonic texture, which means there are many lines of music being played at the same time.  As opposed to medieval times, this music has a more full sound, because the bass register was used, expanding the range of music to about four octaves.  Each line of melody has rhythmic independence, giving Renaissance music a more flowing rhythm and not a sharply defined beat.  The melodies are also easy to sing because they move along scales with few large leaps.

Unlike the previous two periods in music, the Baroque Age was a time of unity.  Most musical pieces of this time expressed one mood throughout the whole piece.  These moods were conveyed through a musical language with specific rhythms and melodic patterns.  One exception to the unified mood is vocal music.  There would be drastic changes in emotion, but they would still convey one mood for a long period in the piece.  One thing that helps the unity of mood was the continuity of rhythm of this time.  The rhythm is maintained throughout the entire piece creating a drive and feel of forward motion that goes uninterrupted.  Along with mood and rhythm, the melody is also continuous.  The melodies tend to be varied throughout the piece and many are elaborate and difficult to sing or remember.  They do not give an impression of balance and symmetry; many times a short opening phrase is followed by a longer one with a flow of rapid notes.  Dynamics are in the same category with the other characteristics; they are usually continuous.  The dynamics in Baroque music have a term called terraced dynamics.  This means that the dynamics usually stay the same for a while, but shift suddenly.  Much of the Baroque music was played in a polyphonic texture with multiple melodic lines.  People of this time believed that music could move the listener in more ways than one.  Opera was a major ideal for this belief.

The Classical Period of music differs from the Baroque Age in that is does not value the fluidity and smoothness of the individual elements of music.  There are contrasts of mood; many of the pieces in classical music will convey numerous moods.  The moods may be a gradual change or a sudden change, depending on the composer, but the composer always has a firm control.  Rhythm is another element that is varied in classical music.   Unlike the Baroque Age of fluid rhythm that rarely changes, classical composers used unexpected pauses, syncopations, and frequent changes in length of the notes.  The texture in classical music in mainly homophonic, meaning there is a main melody backed with a progression of chords, although, like the rhythm, it can also change unexpectedly.  The melodies in classical music have an easy tune to remember.  Although they may be complex compositions, there is usually a basic melody to follow.  They are often balanced and symmetrical with two phrases of the same length.  The widespread use of dynamic change comes from the composer’s interests in expressing their different layers of emotions.  The crescendo and decrescendo became increasingly used to get the audience more involved.  The gradual shift from using a piano instead of the harpsichord came from this desire to have more dynamic changes.  Unlike the harpsichord, the piano allows the player to adjust the dynamic by pressing harder or softer on the keys.  Most classical composers began to want to control their own music, not make music according to what someone else wanted.

Music in Society
Towards the end of the Middle Ages, about the 12th and 13th centuries, music began to move outside of the church.  French nobles called troubadours and trouveres were among the first to have written secular songs.  Music of this time was contained among the nobility, with court minstrels performing for them.  There were also wandering minstrels who would perform music and acrobatics in castles, taverns, and town squares.  These people were among the lowest social class, along with prostitutes and slaves, but they were important because they passed along information, since there were no newspapers.
Music was becoming more popular during this time.  Much of this was due to the invention of the printing press, which could circulate copies of music.  The number of composers also began to increase.  The Renaissance had the ideal of the “universal man” and believed that every educated person was to be trained in music.  Musicians still worked in the churches, courts, and towns.  The size of church choirs grew.  But unlike the Middle Ages where just a few soloists performed in the church, an entire male choir would now sing.  Music was still important in the church, although it has shifted more to the courts.  The kings, princes, and dukes were all fine composers.  One court alone might have had ten to sixty composers consisting of vocalists and instrumentalists.  There was a music director for each court that would compose and direct the court’s performers.  The town musicians would perform for civic processions, weddings, and religious services.  Musicians now had a higher status in society with better pay, and they wanted to be known and sought credit for their work.
During the eighteenth century, the economy began rising and people starting making more money. The prospering middle class could afford larger homes, nicer clothes and better food.  They also wanted aristocratic luxuries such as theatre, literature, and music.  The middle class had a great impact on music in the Classical Period.  The palace concerts were usually closed to the middle class, so public concerts were held.  Many people were not satisfied with always going to concerts to listen to music; they wanted it in their homes as well.  They wanted their children to take music lessons and play as well as the aristocratic children.  Many composers wrote music to appease the public and their music was often easy enough for amateur musicians to play 

Sunday, September 14, 2014

Hybrid Synthesizer - subtractive but addictive A disruptive innovation in software synthesis, nothing else compares to the diversity Sytrus packs. FM, RM & Subtractive synthesis - have it all!. Sytrus is my favorite VST Plugin. 

 Sound engine


SYTRUS VST PLUGIN

Meticulously crafted, Sytrus delivers ethereal lush pads, sonorous bells, scintillating highs or simply dirty grunge. The 6 user-definable operators can act as independent oscillators for subtractive synthesis, cross-modulate to create complex FM (Frequency Modulation) or RM (Ring Modulation) synthesis or the 256 partial harmonic editor can be used to additively synthesize virtually any timbre you can imagine. With up to 64x oversampling Sytrus delivers 100% epic sound.

Effects


Sytrus features 3 independent, chainable, filter units, each containing an array of filters (13 types each with 5 cutoff slope settings) and integrated waveshaper (distortion processor).

The filter units are optionally followed by a Chorus, Delay & Reverb unit. 100% Flexibility.

Presets


With over 500 hand-picked presets Sytrus is ready to contribute to any genre immediately upon installation. Sounds cover - Arps, Bass, Bell, Brass, Chromatics, Drum, DX7, Experimental, FX, Guitar, Orchestral, Organ, Pad, Percussion, Piano, Plucked, Sequence, Synth, String, Wind. 100% inspiration.


Key Features:

  • 6 independent operators with total freedom on oscillator shaping
  • FM, RM, subtractive synthesis
  • Multipoint articulation with unique arpeggiator system
  • Fully controllable & automatable unison
  • Effects: 13 filter types, 3 band Parametric EQ, Phaser, Chorus, Filters
  • X/Y modulation control
  • Up to 64x oversampling (for high-quality FM synthesis)
AWESOME !!!


Music therapy has been practiced for decades as a way to treat neurological conditions from Parkinson's to Alzheimer's to anxiety and depression. Now, advances in neuroscience and brain imaging are revealing what's actually happening in the brain as patients listen to music or play instruments and why the therapy works. "It's been substantiated only in the last year or two that music therapy can help restore the loss of expressive language in patients with aphasia" following brain injury from stroke, says Oliver Sacks, the noted neurologist and professor at Columbia University, who explored the link between music and the brain in his recent book Musicophilia. Beyond improving movement and speech, he says, music can trigger the release of mood-altering brain chemicals and once-lost memories and emotions.

MUSIC HELP YOUR BRAIN


Actually playing music, which requires coordinating muscle movements and developing an ear for timing, can also bring dramatic results. The workshop uses traditional drum ensembles, in which groups of participants play percussion pieces, as one form of therapy for patients with a variety of cognitive and physical disabilities, including Parkinson's disease.
Indeed, research on the effects of music therapy in Parkinson's patients has found motor control to be better in those who participated in group music sessions—improvisation with pianos, drums, cymbals, and xylophones—than in people who underwent traditional physical therapy.
Because the area of the brain that processes music overlaps with speech networks, neurologists have found that a technique called melodic intonation therapy is effective at retraining patients to speak by transferring existing neuronal pathways or creating new ones.

We all like to pump up the tunes when we’re powering through our to-do lists, right? But when it comes to creative work, loud music may not be the best option. Even more than low noise levels, ambient noise apparently gets our creative juices flowing, and doesn’t put us off the way high levels of noise do. In high noise levels, however, our creative thinking is impaired because we’re overwhelmed and struggle to process information efficiently.

Research on the effects of music during exercise has been done for years. In 1911, an American researcher, Leonard Ayres, found that cyclists pedaled faster while listening to music than they did in silence.

This happens because listening to music can drown out our brain’s cries of fatigue. As our body realizes we’re tired and wants to stop exercising, it sends signals to the brain to stop for a break.

What have you noticed about how music affects you?
Dubstep is a genre of electronic dance music that originated in South London, England. It emerged in the late 1990s as a development within a lineage of related styles such as 2-step garage, broken beat, drum and bass, jungle, dub and reggae.
Tempo of dubstep average between 138 bpm to 142 bpm, slower than the drum and bass. Many dubstep wear bassdrop, when the bass suddenly high his tone changed from high to low, so supposing like fall.

Dubsetep


Wobble bass

One characteristic of certain strands of dubstep is the wobble bass, often referred to as the "wub", where an extended bass note is manipulated rhythmically. This style of bass is typically produced by using a low-frequency oscillator to manipulate certain parameters of a synthesiser such as volume, distortion or filter cutoff. The resulting sound is a timbre that is punctuated by rhythmic variations in volume, filter cutoff, or distortion. This style of bass is a driving factor in some variations of dubstep, particularly at the more club-friendly end of the spectrum.

Many early dubstep tracks incorporate one or more "bass drops", a characteristic inherited from drum and bass. Typically, the percussion will pause, often reducing the track to silence, and then resume with more intensity, accompanied by a dominant subbass (often passing portamento through an entire octave or more, as in the audio example). It is very common for the bass to drop at or very close to 55 seconds into the song, because 55 seconds is just over 32 measures at the common tempo of 140 bpm. However, this (or the existence of a bass drop in general) is by no means a completely rigid characteristic, rather a trope; a large portion of seminal tunes from producers like Kode9 and Horsepower Productions have more experimental song structures which do not rely on a drop for a dynamic peak – and in some instances do not feature a bass drop at all.

Skrillex, Famous Dubstep Musicians
Sonny John Moore (born January 15, 1988), better known by his stage name Skrillex, is an electronic dance music producer, DJ, and singer-songwriter. Growing up in Northeast Los Angeles and in Northern California, Sonny Moore joined the American post-hardcore band From First to Last as the lead singer in 2004, and recorded two studio albums with the band (Dear Diary, My Teen Angst Has a Body Count, 2004, and Heroine, 2006) before leaving to pursue a solo career in 2007. He began his first tour as a solo artist in late 2007. After recruiting a new band lineup, Moore joined the Alternative Press Tour to support bands such as All Time Low and The Rocket Summer, and appeared on the cover of Alternative Press' annual "100 Bands You Need to Know" issue.


Thursday, September 11, 2014

Ableton Live


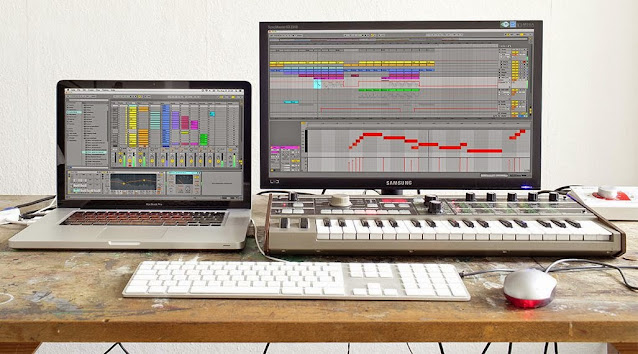
This is it , This is the one of the best virtual music production software and was one of the first music applications to automatically beatmatch songs., yeah , Ableton Live. Ableton Live is a software music sequencer and digital audio workstation for OS X and Windows. . In contrast to many other software sequencers, Ableton Live is designed to be an instrument for live performances as well as a tool for composing, recording, arranging, mixing and mastering.
Instruments
Built-In
By default, Live comes with two instruments - Impulse and Simpler.
  • Impulse is a traditional drum triggering instrument which allows the user to define a kit of up to eight drum sounds, each based on a single sample. There are a number of effects available such as basic equalization, attack, decay, pitch shift, etc. Once the kit is defined, rhythms and beats are created through Live's MIDI sequencer.
  • Simpler is a relatively easy-to-use sampling instrument. It works using a single sample, applying some simple effects, envelopes, and timing, and then applying pitch transformations in the form of Granular synthesis. In this case, incoming MIDI does not trigger drums as it does in Impulse, but selects the final pitch of the sample, with C3 playing the sample at its original pitch.
  • Drum Rack Is a sampler for drums. Midi notes trigger individual "Simplers" so rather than triggering one sample at multiple pitches, individual samples are triggered at predefined pitches, as is suitable for midi drum programming. As is usual with Ableton almost anything can be drag dropped to or from the drum racks, for example you can drop a clip or part of a clip into the drum rack to isolate drum parts from audio.
Hardware Instrument.
Akai Professional makes the APC40, a MIDI controller designed to work solely with Ableton Live. Novation Digital Music Systems has created the "Launchpad" which is a pad device that has been designed for use with Ableton. Ableton has also released their own MIDI controller, the Push, which is the first pad-based controller that embraces scales and melody.
There are a number of additional instruments which may be purchased separately or as part of the Ableton Suite.
  • Amp - a device that delivers the sounds of various amplifiers and cabinet combos. It is the newest add-on and a part of Suite 8.2.
  • Sampler - an enhanced sampler.
  • Operator - an FM synthesizer.
  • Electric - an electric piano instrument.
  • Tension - a string physical modelling synthesizer.
  • Collision - a mallet percussion physical modelling synthesizer.
  • Analog - simulates an analog synthesizer.
  • Drum Machines - a collection of emulators for classic drum machines.
  • Session Drums - a collection of sampled drum kits.
  • Latin Percussion - a collection of sampled latin percussion hits and loops.
  • Essential Instruments Collection - a large collection of acoustic and electric instrument samples.
  • Orchestral Instrument Collection - a collection of four different orchestral libraries, which can be purchased individually or as a bundle: Orchestral Strings, Orchestral Brass, Orchestral Woodwinds and Orchestral Percussion. The Orchestral Instrument Collection is not included in Live Suite.

Effects

The effects featured in Ableton Live are grouped into two categories - MIDI effects and audio effects.


Audio Effects
MIDI Effects
  • Auto Filter
  • Auto Pan
  • Beat Repeat
  • Chorus
  • Compressor
  • Corpus
  • Dynamic Tube
  • EQ Eight
  • EQ Three
  • Erosion
  • Filter Delay
  • Flanger
  • Frequency Shifter
  • Gate
  • Grain Delay
  • Limiter
  • Looper
  • Multiband Dynamics
  • Overdrive
  • Phaser
  • Ping Pong Delay
  • Redux
  • Resonators
  • Reverb
  • Saturator
  • Simple Delay
  • Spectrum
  • Utility
  • Vinyl Distortion
  • Vocoder
  • Arpeggiator
  • Chord
  • Note Length
  • Pitch
  • Random
  • Scale
  • Velocity
A call-to-action text Contact us